Monday, May 10, 2010

WRITE BACK


I would like give small report on writeBack in obiee:

Im using sh schema in oracle database.
PreRequests for writeback:
  1. User must have writeBack privillegers.
  2. Direct database access privillegers.
1. FOR PREVILIGES LOG IN PRESENTATION SERVER AS "ADMINISTRATOR", THEN GO TO    "SETTINGS"------>"ADMINISTRATION".AS SHOWN BELOW.


2.NOW CLICK ON THE "MANAGE PREVILIGES"                                                                           


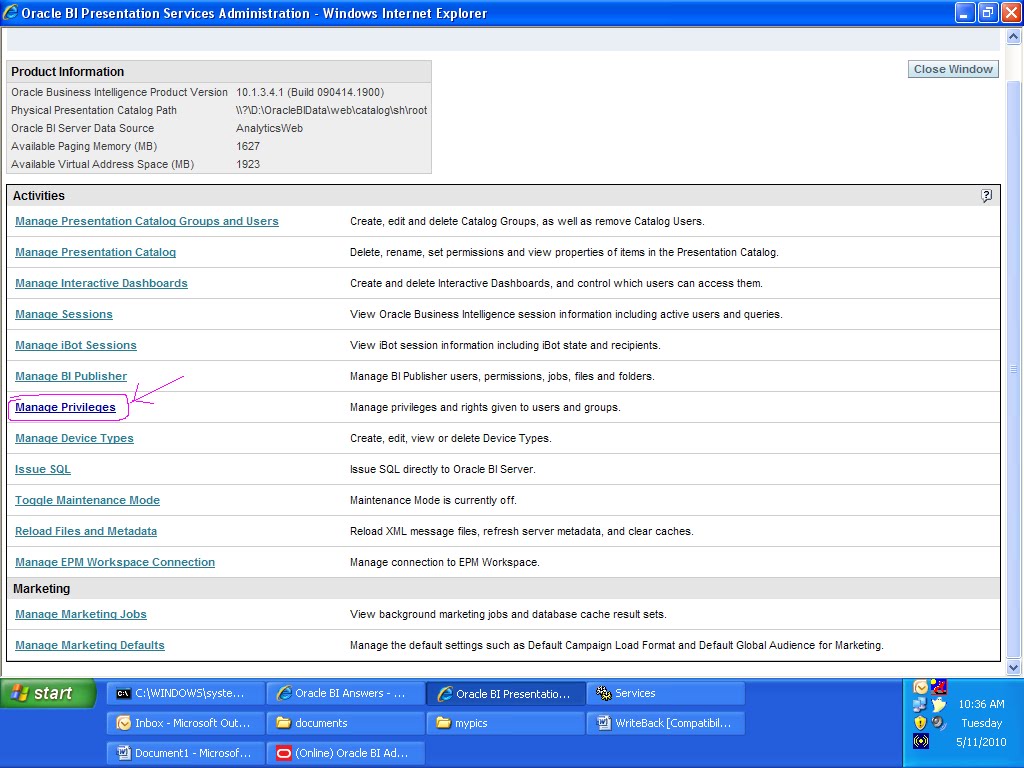
3.SEARCH FOR THE "WRITE BACK", IT IS THE LAST PREVILIGE IN THE LIST,SCROLL DOWN.


4. BY DEFAULT IT IS "NOT ASSIGNED "CLICK IT AND ADD "PRESENTATION SERVER AND ADMINISTRATOR" FOR BOTH AND CLICK FINISHED AND CLOSE WINDOW.

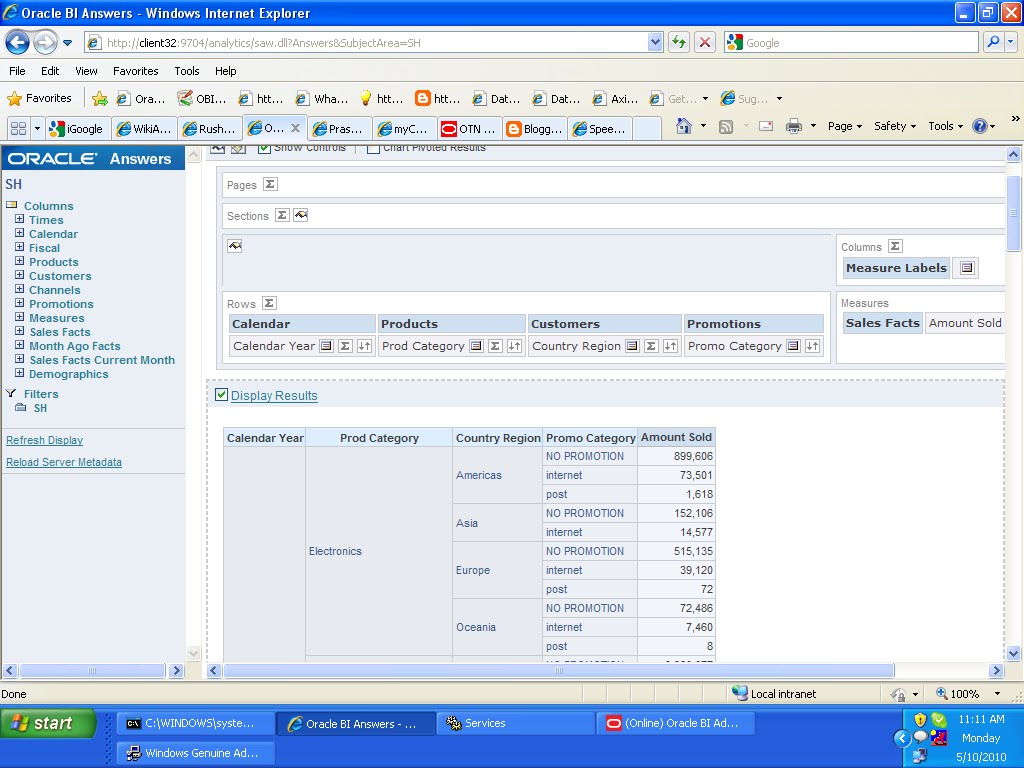
5. GO TO THE ANSWERS AND SELECT "COUNTERY ID " AND "COUNTRY REGION"              COLUMNS     


6.AFTER SELECTING THE COLUMNS SEE THE RESULTS IN "TABLE" FORMAT, AND SELECT THE ""WRITE BACK PROPERTIES"" BELOW THE TABLE NAME.                    


7.WE WILL GET THE EDIT PROPERTIES FOR WRITE BACK                                                            

A. FIRST CHECK THE "ENABLE WRITE BACK"
B.TEMPLATE NAME AS "WRITE_BACK"             
C.NAME THE BUTTON TEXT AS""WRITE""          
D.LEAVE THE BUTTON POSITION AS ""DEFAULT" 


CLICK OK  


8.U CAN SEE THE BUTTON  ""WRITE"" BELOW THE RESULTS, BUT IT IS NOT                        "ENABLED", WE CAN SEE HOW TO ENABLE IT.                                                                  


9.NOW GO TO THE "CRITERIA", SELECT THE "COUNTRY REGION" COLUMN PROPERTIES THEN GO TO "COLUMN FORMAT"---- SELECT THE "VALUE INTERACTION" AS"""WRITE BACK"" AS SHOWN BELOW SCREEN SHOT  


10.GIVE THE FIELD SIZE AS UR WISH---- HERE I AM TAKING "6"AND CLICK OK                  


11.NOW SEE THE RESULTS U CAN SEE THE COUNTRY REGION  NAMES CAN   BE "ENABLED", WE CAN GIVE NEW NAME IN THE FIELD AND PRESS "WRITE" THEN IT IS WRITTEN IN TO DATA BASE------BUT CURRENTLY STILL WE DONT HAVE "WRITE"BUTTON ENABLED


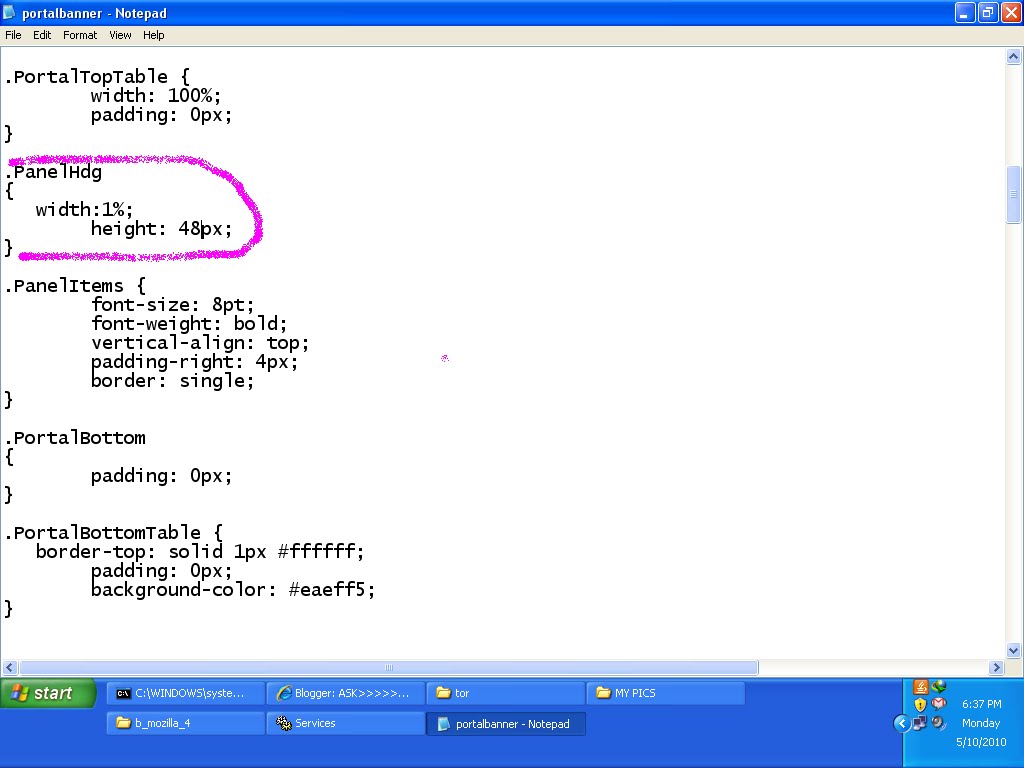
12. NOW WE CAN SEE HOW TO ENABLE THE "WRITE" BUTTON, FIRST OF ALL GO TO THE BELOW URL AND SAVE A FILE WITH NAME AS REPRESENTED BELOW IN .XML FORMAT

D:/ORACLEBI\WEB\MSGDB\CUSTOMMESSAGES\


 BE SURE OF THE ABOVE RED MARKED THINGS PROPERLY CONFIGURED OR NOT.
 
We have to modify connection pool same as in administrator tool
  1. writeBack connectionPool="WriteBack"
  2. We have to modify the template name tag attributes same as in report specified name
  3. WebMessage name="Write_back"
  4. Insert and updates are modified as far as our requirement concerned
     

13.NOW GO TO THE ANSWERS AND SEE THE RESULTS OF THE SPECIFIED SAVED FILE OF "WRITE BACK".....NOW THW BUTTON WRITE IS ENABLED.

WAT EVER THE MODIFICATIONS NOW U CAN DO AND PRESS WRITE BUTTON DIRECTLY IT WRIT IN DATA BASE.


HOPE THIS MA Y GIVE U AN IDEA REGARDING THE "WRITE BACK"              


OWN LOGO IN BI ANSWERS

NOW I WILL SHOW U AN INTERESTING PART IN BI ANSWERS.

CHANGING THE LOGO OF BI ANSWERS BY OUR OWN LOGO.

AFETR LOGIN IN TO BI ANSWERS WE WILL HAVE DEFAULT SCREEN AS FOLOWS.


WE CAN CHANGE THE LOGO AS FOLLOWS, SUCH THAT WE CAN PUT OUR OWN LOGO


1.IT  IS VERY SIMPLE TO CHANGE TO LOGO, FIRST OF ALL GO TO THE BELOW ADDRESS:


"D:\OracleBI\oc4j_bi\j2ee\home\applications\analytics\analytics\res\s_oracle10\b_mozilla_4"

2.NOW U CAN SEE A FILE "PORTAL BANNER.CSS" OPEN IT IN NOTEPAD, THEN GO TO THE PORTAL BANNER CONFIGURATION, U CAN SEE THE DEFAULT BANNER IMAGE NAMEAS "BG_BANNER".


3.NOW CHANGE THE IMAGE NAME AS UR LOGO NAME, MAKE SURE                                THE ME, AND COPY THAT IMAGE IN   TO THE                                                                  "D:\OracleBI\oc4j_bi\j2ee\\analytics\analytics\res\s_oracle10\b_mozilla_4"


4.HERE I SAVED THE IMAGE WITH NAME "RUSHI_BANEER" WITH DIMENSIONS 150*87, MAKE NOTE OF THE DIMENSIONS ALSO.


5. I CHANGED THE NAME OF THE IMAGE AS "RUSHI_BANNER" AND I SAVED IT            


6. NOW SEARCH FOR THE".PANEL HDG" IN THE PORTAL BANNER IT SELF, BY DEFAULT WE WILL HAVE HEIGHT AS 48 PIXLES,


7.BUT OUR LOGO IS 158*87 SO CHANGE THE HEIGHT IN TO "87" PIXLES             


8. SAVE THE "PORTALBANNER.CSS" AND RESTART THE "BISERVER " AND PRESENTATON SERVICES" AS FOLLOWS.

GO TO RUN COMMAND AND TYPE "SERVICES.MSC"


9. NOW U WILL GET THE SERVICES, SEARCH FOR BI SERVER AND ORACLE BI                 PRESENTAION SERVER , RESTART BOTH THE SERVICES.                      


10. NOW AGAIN LOGIN TO BI ANSWERS                                                                                         


11. U WILL GET THE NEW LOGO OF "BI ANSWERS " AS SOON AS U LOGGE IN AS FOLLOWS.


WE CAN ALSO CHANGE THE BACK GROUNFD COLOR BY CHANGING THE BACK GROUND COLOR IN PORTAL BANNER AS BELOW


CHANGE THE COLOR AS U DESIRED FOR EXAMPLE PUT  "#FF0000"  FOR "RED", "#FF00FF" FRO "PINK", "#FFFF99" FOR"YELLOW"

FOR EXAMPLE I WILL TAKE THE COLOR "#FF00FF" FOR "PINK", AFTER SELECTING RESTART THE BOTH SERVICES, MAKE SURE RESTARTING THE SERVICES THEN U CAN SEE THE BI ANSWERS AS FOLLOWS


THUS WE CAN CHANGE THE LOGO, TRY URSELF AND HAVE FUN WITH UR OWN LOGO.

ANY SUGGESTIONS AND COMMENTS REGARDING THIS WELCOME

Sunday, May 9, 2010

PAGE ITEMS IN PIVOT TABLE


HI, TODAY I HAVE A NEW THING REGARDING THE "PAGE ITEMS IN PIVOT TABLE"

LOG IN TO BI ANSWERS AND SELECT THE SUBJECT  AREA           


1.LET US TAKE THE CRITERIA AS  BELOW                                                                                     


2.NOW SEE THE RESULTS IN TABLE FORM, AND IF U WANT TO SEE IN THE PIVOT TABLE FORM SELECT THE DROP DOWN LIST AND SELECT "PIVOT TABLE" .   


3.BY SELECTING THE PIVOT TABLE U HAVE THE VIEW LIKE BELOW SCREEN SHOT.            


4.DRAG THE CALENDAR YEAR COLUMN FROM "ROWS"   LIST TO THE "PAGES". U                 CAN  GET THE "DROP DOWN LIST" OF THE "YEARS' IN "RESULTS".                                 


5.NOW DRAG THE "PRODUCTS CATEGORY" FROM "ROWS" TO "PAGES", U CAN  VIEW BOTH "YEAR AND PRODUCT CATEGORY" DROP DOWN LIST SIDE BY SIDE WITH CORRESPONDING YEAR AND CORRESPONDING PRODUCT CATEGORY.


6.IF WE WANT BOTH OF THE"YEAR" AND "PRODUCT CATEGORY" DROP DOWN LIST INDEPENDENTLY THEN GOT HE MORE OPTIONS OF PRODUCT CATEGORY AS SHOWN BELOW THEN U CAN SEE  "START NEW PAGE DROP DOWN"


7.SELECT THAT THEN U CAN SEE THE BOTH OF THEM INDEPENDENTLY DROP DOWN LIST


8. NOW WE CAN THE NEW THING, WHEN U SELECT THE YEAR DROP DOWN LIST WE CAN SEE ONLY SEE AND GET RESULTS OF ONE YEAR AT A TIME.                              


NOW IF  WE WANT TO SEE THE RESULTS REGARDING ALL YEARS, THEN WE HAVE AN OPTION .


9. SELECT THE SUM OPTION (SIGMA), THEN U CAN SEE THE OPTIONS                                "NONE","BEFORE","AFTER" ETC ETC.......

SELECT THE "AFTER " (OR)  " BEFORE OPTION AS UR WISH                                             


10.NOW SEE THE RESULTS AND CHECK THE DROP DOWN LIST OF CALENDAR YEAR, U CAN SEE "ALL PAGES" NEWLY ADDED TO THE DROP DOWN LIST .       


11. IF U WANT TO CHANGE NAME OF THE "ALL PAGES" U CAN DO IT BY SLECETING THE 
"FORMAT LABELS" FROM THE SUM(SIGMA ) OPTION AS BELOW SCREEN SHOT.


12.BY SELECTING THE "FORMAT LABELS"WE WILL GET THE "EDIT FORMAT" TAB.


13. WRITE DOWN THE NAME U WANT IN "CAPTION " AND CICK OK.IT WILL DISPLAY IN THE DROP DOWN LIST OF THE YEAR, HERE I NAMED IT AS "ALL YEARS".       


14. CHECK THE DROP DOWN LIST OF"YEARS" U CAN SEE THE "ALL YEARS" INSTEAD OF "ALL PAGEES"                                                                                                         


THUS THE PAGE ITEMS IN PIVOT TABLE WORKS, HOPE THIS MAY HELP U IN CREATING PIVOT TABLE PAGE ITEMS VIEWING


ANY SUGGESTIONS AND COMMENTS ARE WELCOME


Thursday, May 6, 2010

NAVIGATION

NAVIGATION FROM ONE REPORT TO ANOTHER       

Hi All, i am referring here the way how we will get navigate to another report when we click column of  one report.

Actually the basic logic in Nvaigation is when we click on one column of one report it should result in giving another new report in new window. I will explain how actualy it works.

For implimeting  Navigation we have to require to reports.Now for example we are going to crreate two reports "NAVIGATE" and "NAVIGATE1".

I will show u how NAVIGATION works

First we are going to create a Report named "NAVIGATION"

Go to ANSWERS and we can see the columns on right side of console. Now i havr requirement like  I am going to take "CALENDAR YEAR", "COUNTRY REGION", "AMOUNT SOLD".
Check the below screen shot


2.Now iam going to make a filter for year for this click on the filter button and then we can get the edit filter tab.
check the all choices and selest the year as 2001(OPTIONAL, select as ur wish). Check the below screen shot.


3. make sure the filter is assigned , we can see the filter in the criteria after it is created in down of the columns.


4.See the "RESULTS" by clicking results on the top of columns.. As we applied the filter for "CALENDAR YEAR" as "2001", it is showing only the 2001 RESULTS regarding to "COUNTRY REGION" and "AMOUNT SOLD".


5. Now "SAVE" the report with name "NAVIGATION".


6.Now again create another REPORT with name "NAVIGATION1", asusual go to answers and select the criteria as  "CALENDAR YEAR",COUNTRY REGION",COUNTRY SUB REGION","COUNTRY",
"AMOUNT SOLD".


7.Now create a filter for the year as operator is equal to\is in"2001". It will be like below screen shot.


8.Nowcreate a filter for country region.Select any country region as u wish here it is "ASIA". click "OK"


9.U can see the both Filters that we created on Calendar Year nad Counter Region. Make sure of it.


10.Now Just click on "RESULTS" and check wat it shows, Results as below as we aaplied fiters showing results for  "ASIA" and for the "YEAR 2001" only.


11.Save this Report with name "NAVIGATION1" s shown in the below screen shot.


12.Now go to answers open the report "NAVIGATION" from where u saved it it will be like below screen shot.


13.Clisk on "MODIFY", then it willl show us the criteria.                                                                                 


14.Now click on the Column Properties of the "COUNTRY REGION".                                                    


15.Go to "COLUMN FORMAT" and see the drop down menu of the "VALUE INTERACTION", it is ijn          "DEFAULT" mode , now select it as "NAVIGATE". as shown below screen shot.                                   


16.Now Click on the "ADD NAVIGATION TARGET" .                                                                                 


17.Now it will shows us two boxe one with Target to be browse and other with caption, Now select                   the "TARGET"--- click  "BROWSE", select the name of the second report that is "NAVIGATE1"(select the  report which u want to display when u click on column of first report to navigate to second report..                 


18.CLICK OK after select the second report.and now "SAVE the "NAVIGATION" report as we modified it.


19.Now all our work is over just click "RESULTS" to see the "NAVIGATION " reports.                           


20. NOW WE WILL SEE HOW NAVIGATION WORKS, AS WE GIVN NAVIGATION TO               "COUNTRYREGION", CLICK ON ANY COUNTRY REGION THEN IT WILL SHOW U ITS CORRESPONDING REULTS FROM  "NAVIGATION1"               


HERE WE ARE SELECTING THE COUNTRY REGION as "EUROPE" Now see the results it will navigate to report "NAVIGATE1" and shows results only regarding to the "EUROPE "


Results which it is coming from report"NAVIGATE1" only for country region "EUROPE"


LIKE WISE CROSS CHECK FOR  remaining country regions in report "NAVIGATION" we will now check for the country region   "AMERICA"


CHECK FOR country region  "ASIA".


CHECK FOR country region "OCENIA"


CHECK FOR country region  "MIDDLE EAST".


Thus the NAVIGATION from one report to another is achieved, we will get the reports of that particular country region that we are selecting in first report


I HOPE THIS MAY HELP U, ANY SUGGESTIONA ND COMMENTS REGARDING THIS IS APPRECIABLE AND WELCOME